
A Beginner’s Guide to Foam Modelling Tools and Materials by Paul Naylor
I’ve been using XPS foam for about 10 years and it’s now my favorite ‘go-to’ material for modeling scenery and terrain. Its many advantages include being light, and rigid, it can be carved, engraved, and textured, and is easy to cut and assemble with simple tools.
This basic guide will look at some of the tools and materials that I use. Although there are many and varied tools and materials available for use in different kinds of foam model making, this guide will focus only on those used for making small-scale model scenery and terrain. It’s by no means a comprehensive list or an endorsement. I would encourage you to experiment with other tools and materials as there are new and interesting ones appearing on the market all the time.
FOAM SHEET
The two main types of foam used in scenery and terrain building are XPS (extruded polystyrene) and EPS (expanded polystyrene).
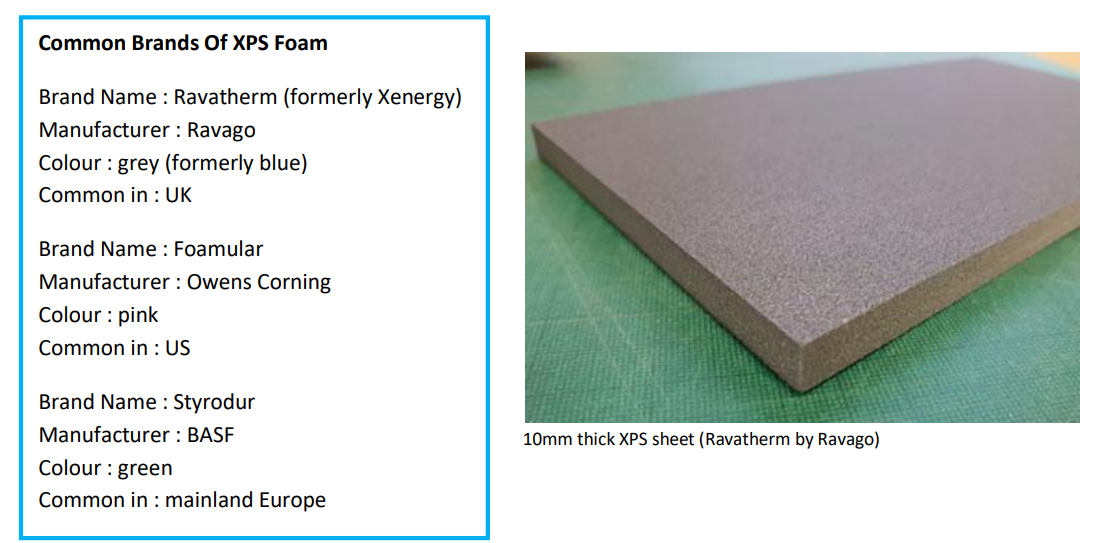
XPS
Extruded polystyrene sheet is a dense foam that cuts easily with a knife or hot wire and has a flat regular surface. It’s available in various sizes, thicknesses, and densities sand is relatively cheap to buy, but more expensive than EPS. Its primary use is as an insulation material and is commonly used for under-floor heating.
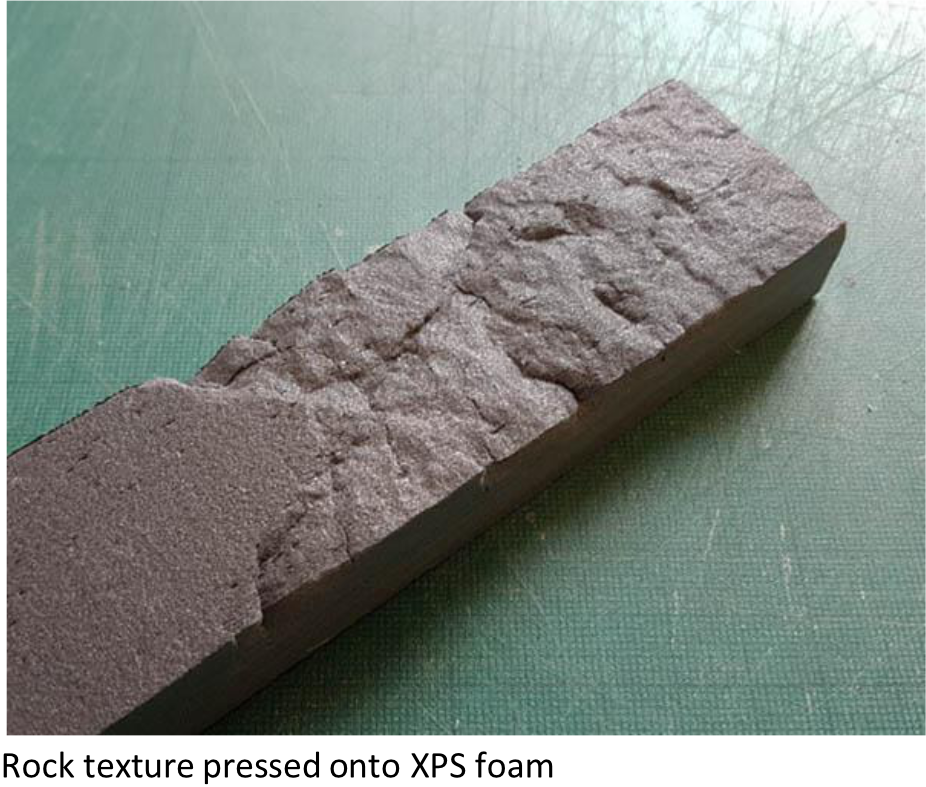
It’s ideal for making buildings and scenery. The surface can be easily textured to look like stone or wood and can be engraved or impressed to look like brickwork, flagstones, and other architectural features.
It can be difficult to find a supplier for XPS in some countries and the quality of the foam sheet can vary.
To find it in your area search online for “XPS foam sheet”, “under-floor heating underlay” or a brand name.
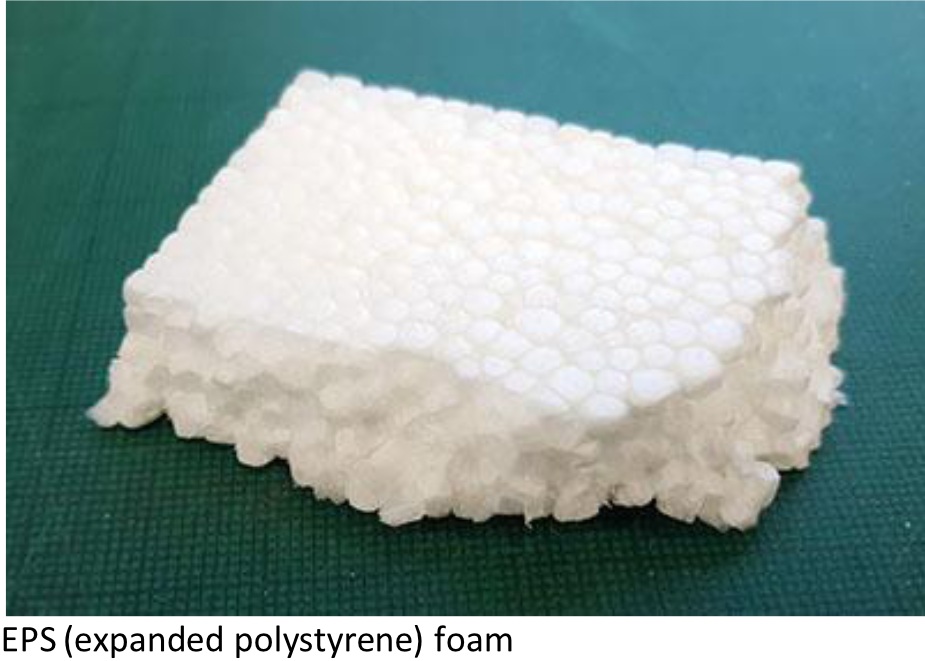
EPS
Expanded polystyrene is a low-density foam used for insulation and protective packaging. It’s usually white but does come in other colors. It can be cut with a knife or hotwire. Easily identified by its ‘bobbly’ texture.
It’s formed from small beads of polystyrene compressed together. These easily separate making it hard to use for fine detail work.
The bead texture and springiness of the foam also make it difficult to engrave or texture. There is a less common, denser EPS, made from smaller beads, that is used for making insulated boxes. That foam can be engraved and textured for larger-scale modeling (1/32 upwards). EPS is good for large terrain features and provides support for a surface coating like plaster.
OTHER TYPES OF FOAM
There are a few other types of foam that are not so good to use for various reasons. They can have their uses but are best avoided, especially by the beginner, in favor of XPS and EPS foam. These include:
Polyurethane Foam, it can be bought as sheets or as expanding foam in cans. Produces unpleasant dust when cut.
Phenolic Foam, often foil backed, is used in the construction industry, and the green ‘oasis’ is used in flower arranging.
Produces lots of unpleasant dust. Soft, making it difficult to engrave or texture.
OTHER USEFUL MATERIALS
FOAMBOARD
Also known as ‘Foam Core’ or ‘Foam core Board’. It is a sheet material that has foam in the middle and paper on the top and bottom surfaces. Cheap, lightweight, and easy to cut with a knife.
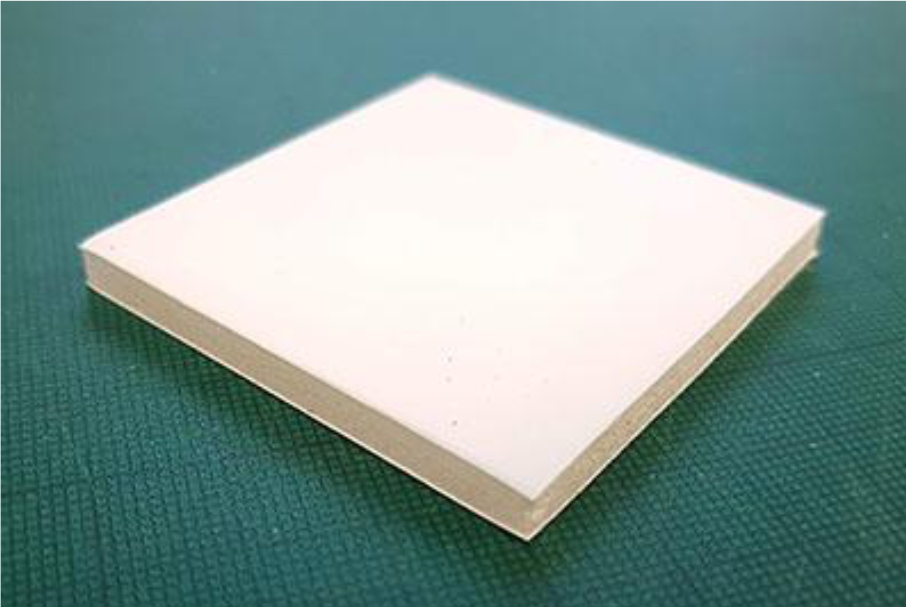
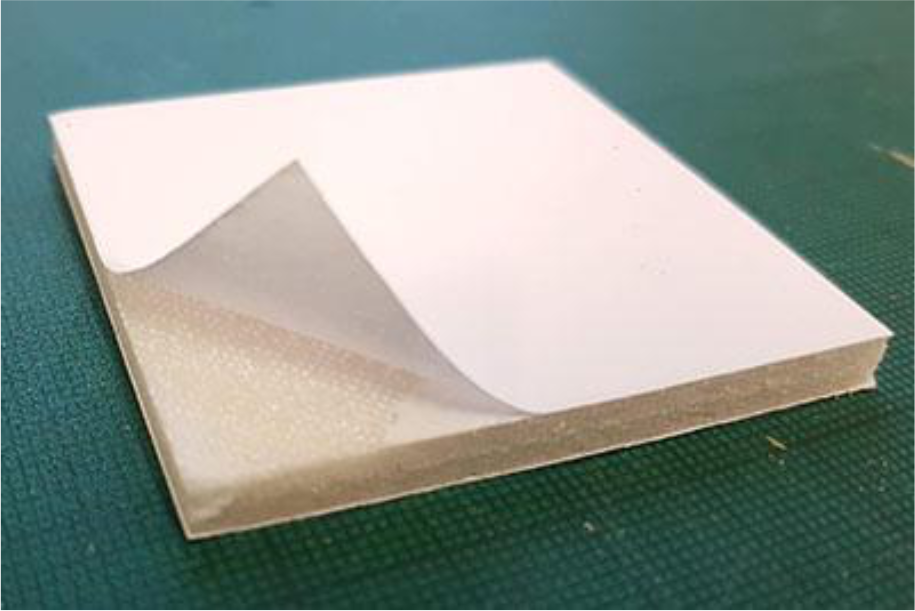
It comes in a range of sizes and thicknesses, 5mm being the most common. It’s ideal for making the main structure of buildings before adding detail and texture with other materials.
KAPA Line Board is a brand of foamboard that has easily removable paper and a less springy foam layer that is better suited to engraving and texturing than standard foam board.
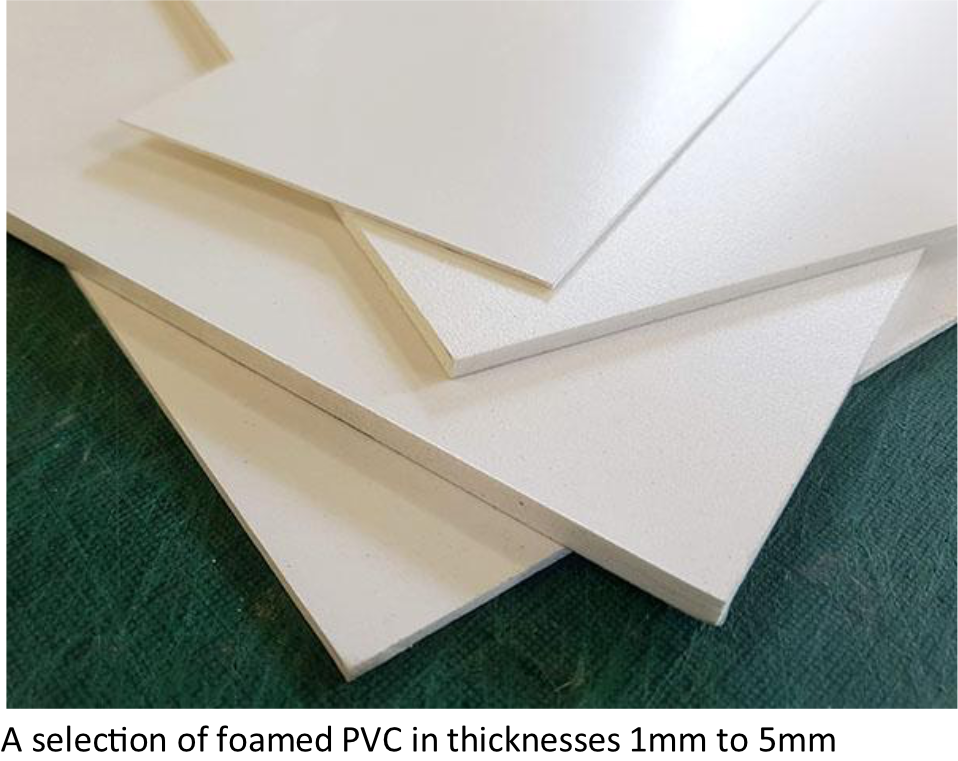
FOAMED PVC
Foamed PVC is a sheet material with a very dense internal structure and a smooth, flat surface. Its primary use is in the printing industry, mainly for signage. It’s available in various colors, sizes, and thicknesses. I regularly use 5mm, 3mm, and 1mm thicknesses. These thicknesses can be cut with a knife. Anything thicker would probably need to be sawn.
It has a hard surface making it difficult to texture but can be engraved with detailed grids and patterns using a metal stylus. When glued together using CA (superglue) it makes very strong structures so is good for reinforcing things like bridges and walkways made from XPS. It’s also ideal as an alternative to MDF for basing scatter terrain and buildings on as it’s very easy to cut and less prone to warping. In the UK it’s sold under the brand names of Palfoam, Palight, and Foamex.
TOOLS
KNIVES
The best knife to use for cutting XPS foam is a flat-bladed craft/utility knife, the snap-off blade type. I have a few including one with a locking wheel. The one I use the most is the cheapest and most basic knife I have. They all use the same 18mm blades.

The key to making a good clean cut on an XPS foam sheet is to make sure the blade is very sharp and keep it at a low angle to the sheet when cutting, so you slice through the foam using a lot of the blade.
I never snap off the blades. Instead, I regularly re-sharpen the whole blade using either an electric or hand-held sharpener.
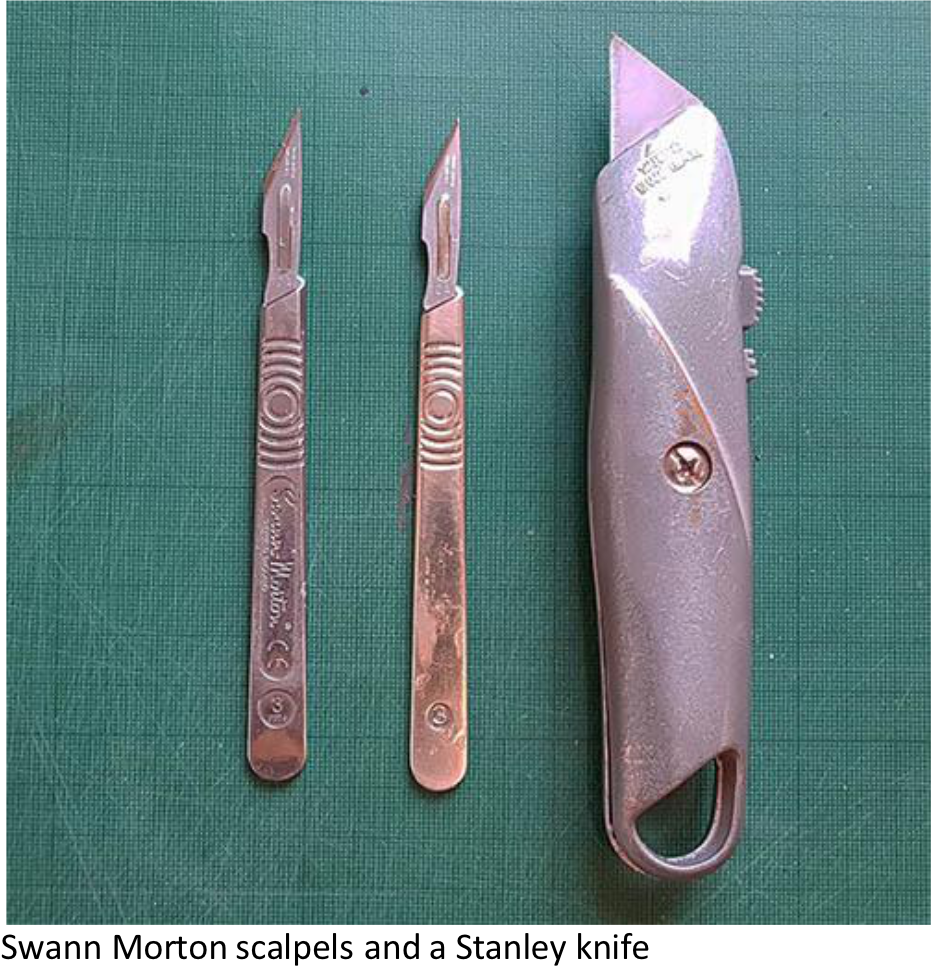
For cutting foamed PVC sheet, which is a denser material I use a Stanley knife.
For detailed and more precise cutting on XPS, foamboard, and 1mm foamed PVC I use a scalpel (Swann Morton no.3 handle with 10A blades). An X-Acto knife would do the same job.
HOTWIRE FOAM CUTTERS
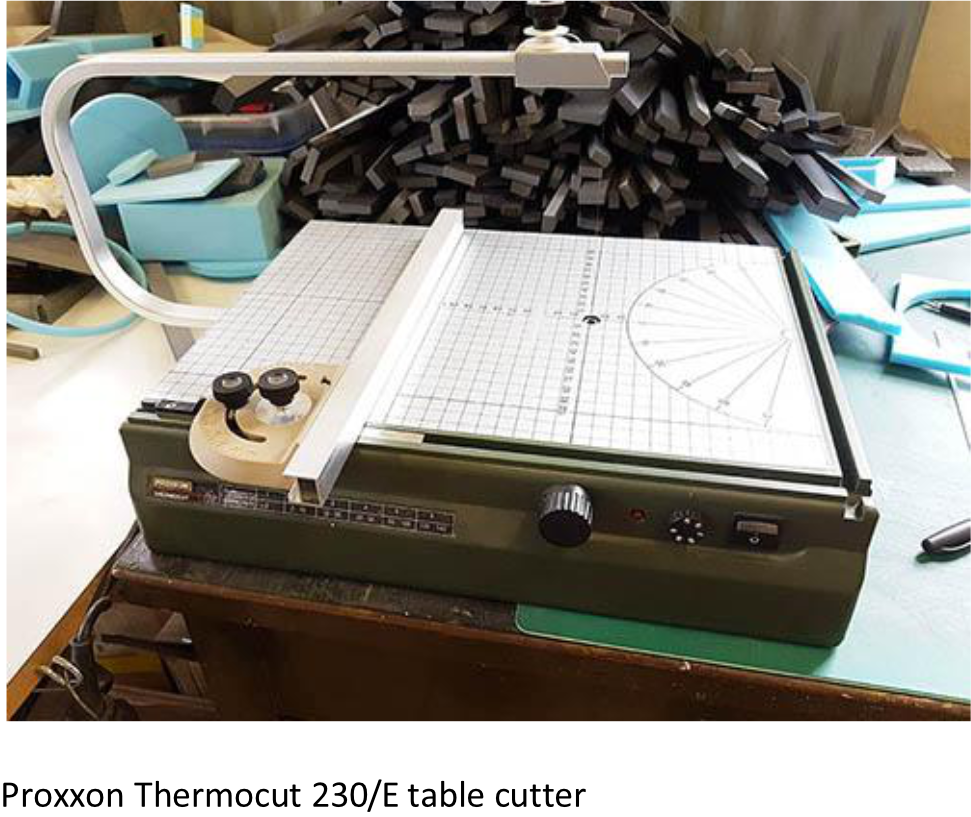
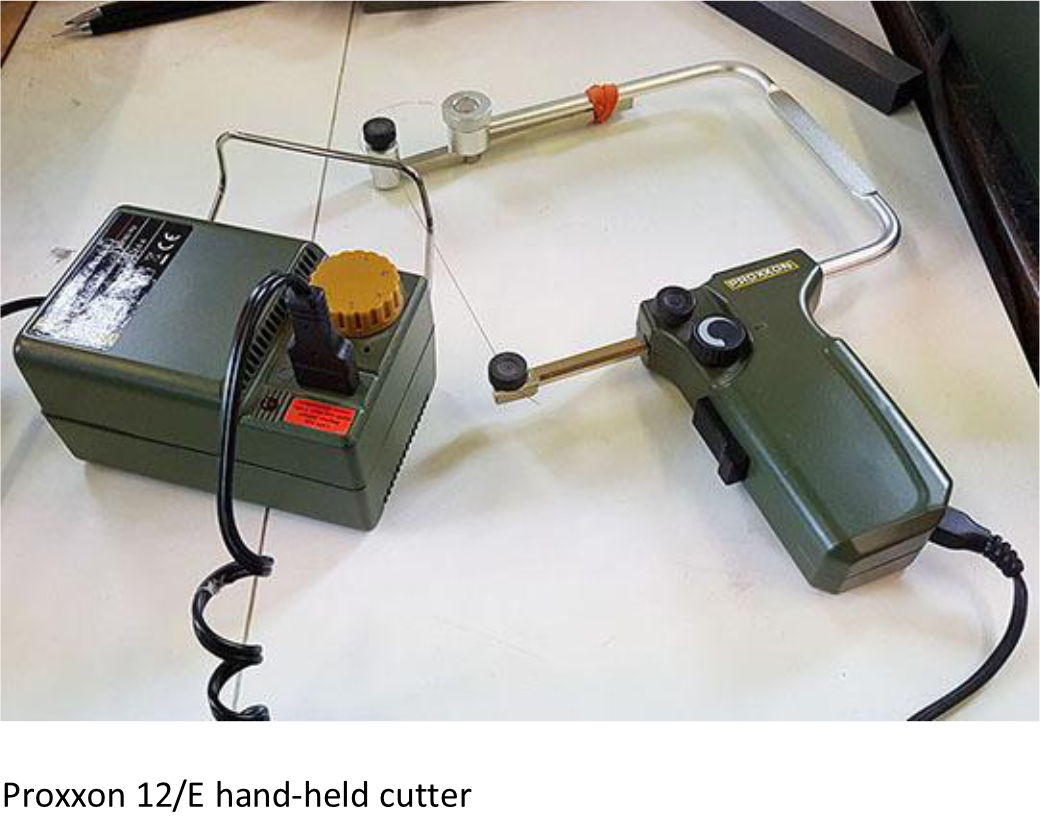
For clean and accurate cutting of XPS and EPS foam, you can’t beat a hotwire cutter. They come in two main categories: tables and hand-held. Tables are good for cutting precise shapes and angles, so are ideal if you intend to make buildings out of foam. Hand-held cutters are better for free-form shapes and quick removal of material on blocks of foam, so are ideal for making landscaped boards and big, natural terrain features.
They have a wide range of prices which often corresponds to how much power it has, which means whether it can sustain a high enough temperature on the wire to cut the material. Most hotwire cutters will cut EPS foam with ease but some cheaper ones may struggle to cut XPS foam, which is much denser. It’s important to check the cutter you are buying is suitable for the type of foam you are working with by looking at the technical specifications and, preferably, reviews of it by other users.
I use a Proxxon Thermocut 230/E table cutter on a daily basis and also have a Proxxon 12/E hand-held cutter. Hot Wire Foam Factory also makes a range of cutters.
RULERS & STRAIGHT EDGES
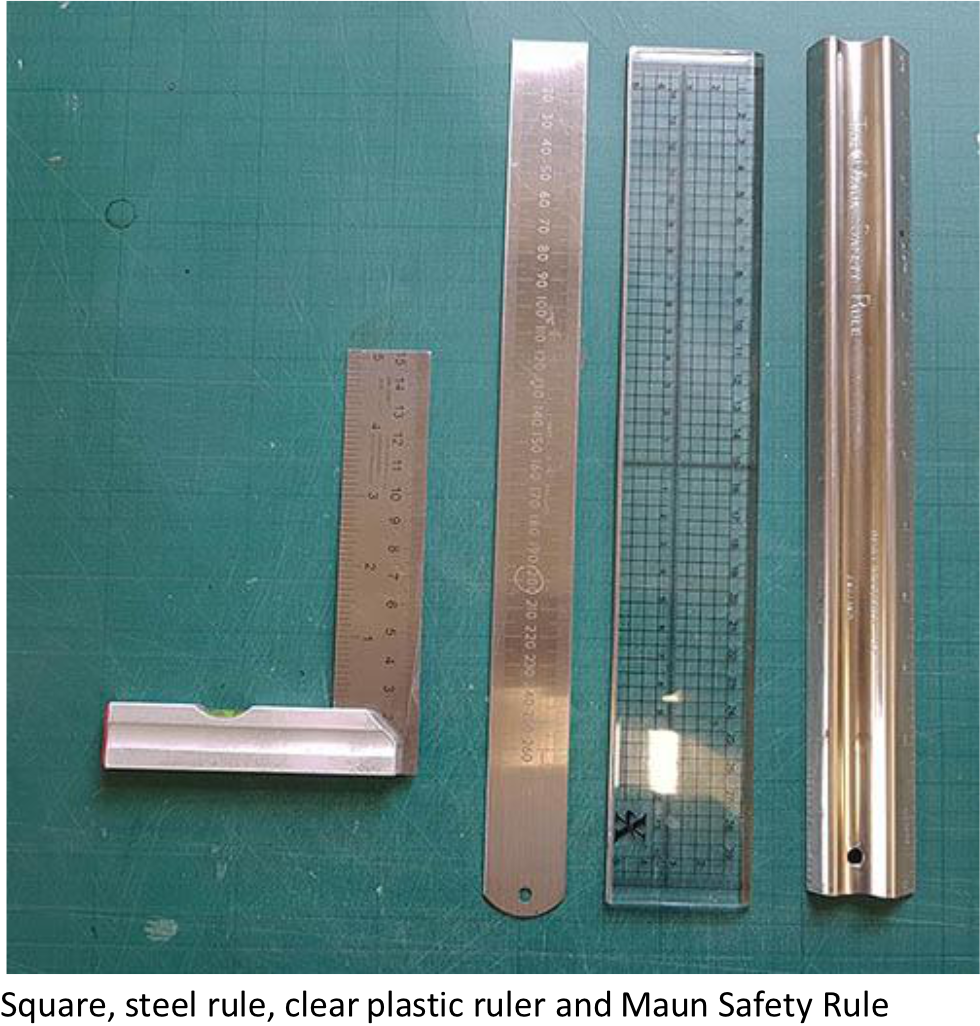
I use a large selection of rulers and straight edges of different sizes. The ones I use most often are a 30cm steel ruler, a clear plastic ruler, a Maun Safety Rule, and a small square. For cutting large sheets of foam I also have a heavy aluminum straight edge and an old ‘T’ square from my technical drawing days. The T square has a strip of coarse sandpaper stuck to the underside with double-sided tape. This stops the ruler from sliding around on the foam and means you can hold it in place with very little pressure. The clear plastic ruler has parallel lines and a grid marked on it at 5mm intervals. This is really useful for quickly cutting strips the same width. It also has a metal edge down one side to stop knife blade nicks.
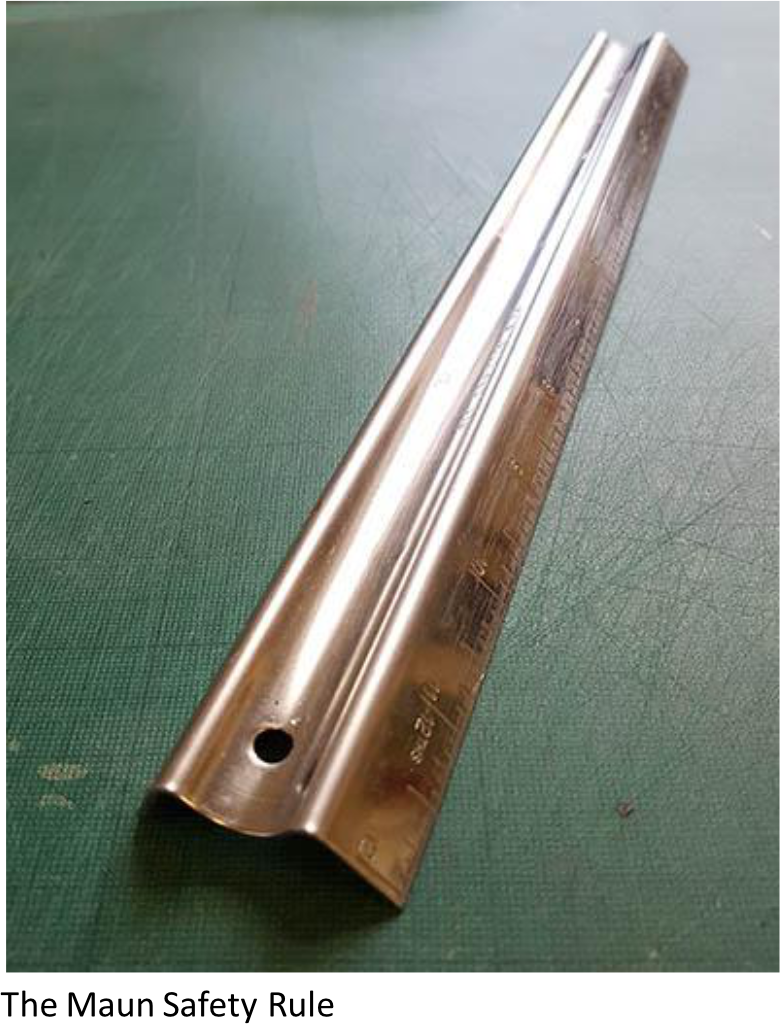
THE MAUN SAFETY RULE
This useful little rule is made from pressed steel and has a runnel down the length of it for your fingers. This keeps your fingers away from the edge and the knife blade. This may be why it’s called a safety rule, I don’t know for sure. In all the years I’ve been using blades and rulers I’ve never once come even close to cutting my fingers.
Maybe the ‘safety’ in the name refers to it being safe for your workpiece rather than you. The ruler rests on its edges rather than a flat surface like a normal ruler so it is less likely to slide and skid around when you are cutting. Because it rests on its edges you need less pressure than a normal flat ruler to keep it in place.
The other very useful feature it has is that the two edges are angled. One is 45° and the other is 60°. By holding the flat of a blade against the angle you can cut a reasonably good beveled edge on a foam sheet, which is handy if you don’t have a hotwire cutting table.
ENGRAVING, SHAPING & TEXTURING TOOLS
There are so many tools you can use for this. Most are meant to be used for some other purpose so the main thing to do is experiment, improvise, and find what works for you. Here are a few of the tools I use regularly.
SANDING BLOCK
Specifically a ‘hook and loop’ (Velcro) sanding block. This particular sanding block is made from foam rubber, making it light and easy to hold. I have 80 grit on one side and 240 grit on the other. I don’t know how I ever managed without this simple tool. As well as smoothing and shaping, very coarse sandpaper can also be used to add woodgrain texture to XPS and foamed PVC.
WIRE BRUSHES
Very useful if you want to add wood grain or thatch texture to XPS foam. I have large and small brushes, both are brass wire. I sometimes use a steel wire brush but being stiffer it can easily damage the foam.
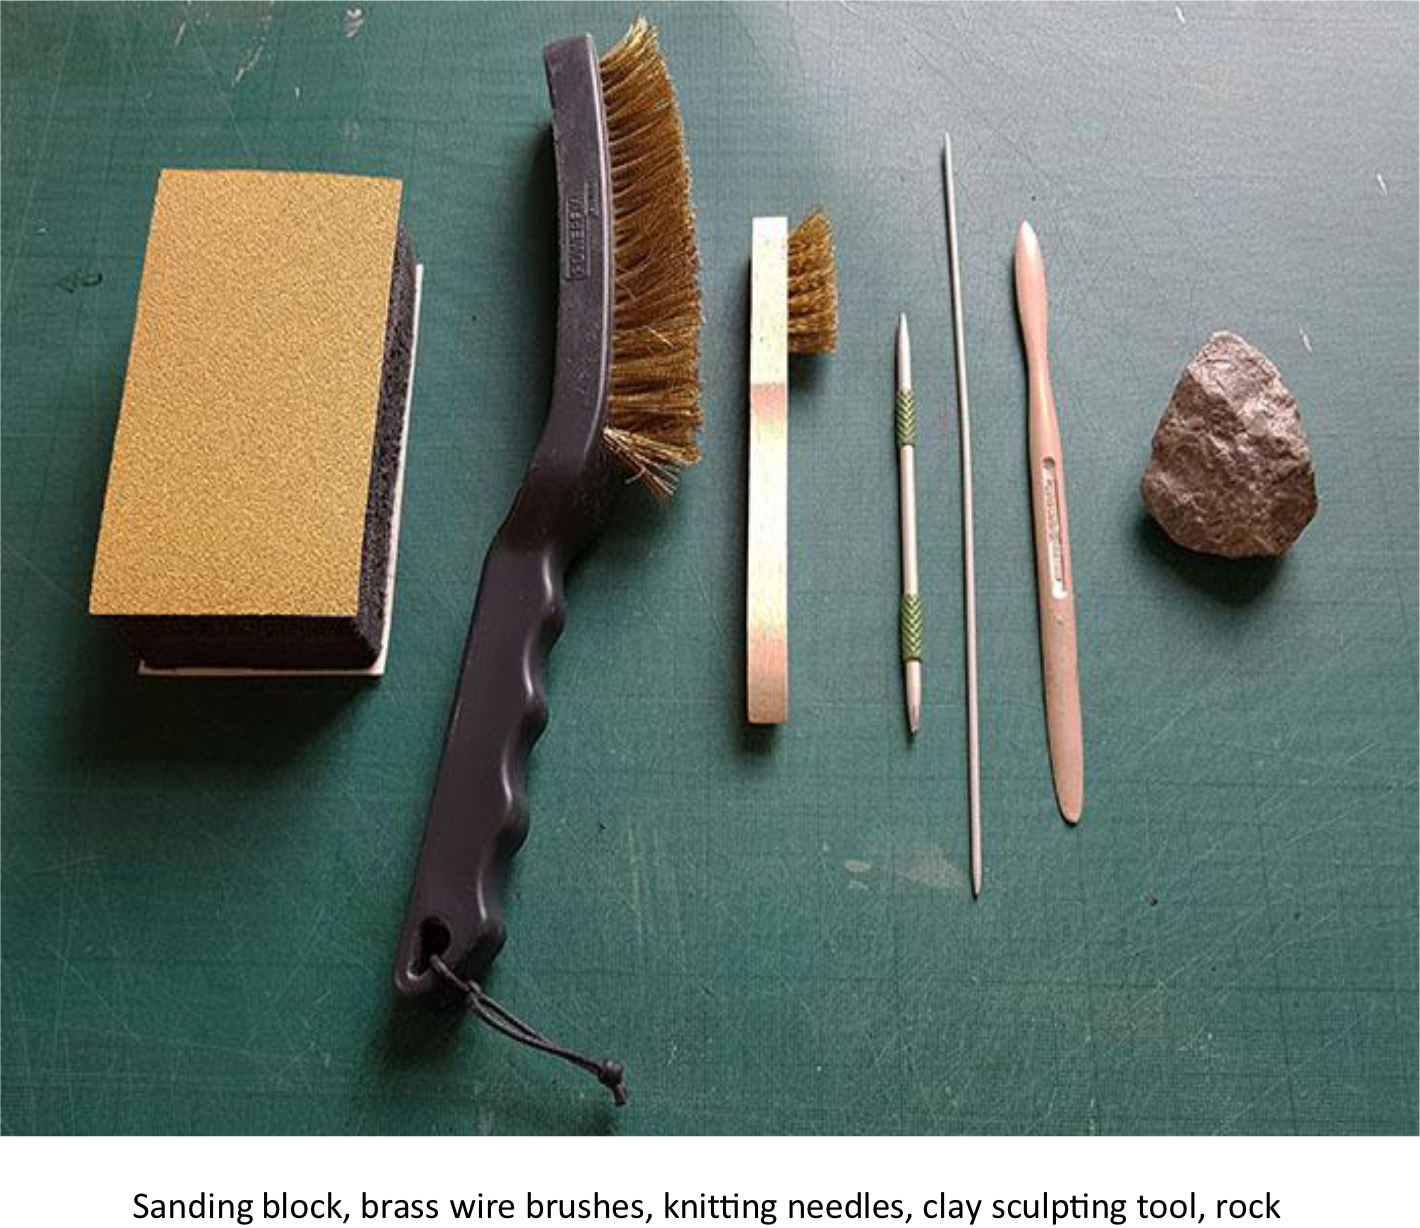
KNITTING NEEDLES
I use these for engraving detail into XPS foam and foamed PVC. I have several, all with different-sized points. You can also use ballpoint pens and pencils for the same thing.
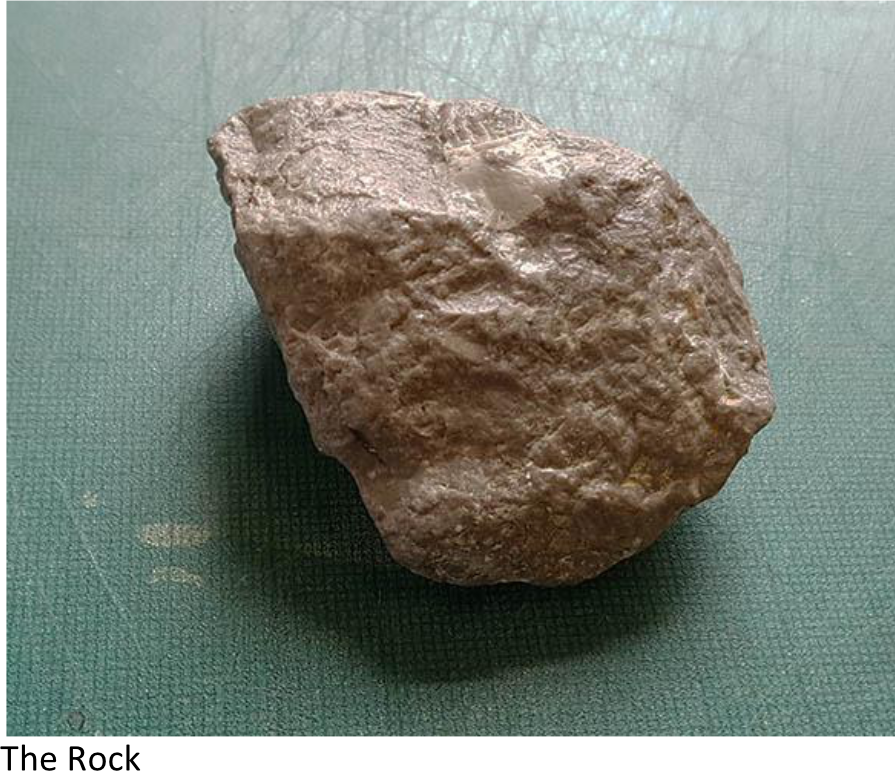
ROCK
The best way I’ve found to add a rock surface texture to foam is with real rock. I found this rock while walking one day. It’s possibly rail track ballast, maybe granite. It has the perfect combination of textures and edges so I can use it to create a range of effects on the foam. I use it every day and it’s probably the most valuable tool I own. When pressed onto XPS foam it leaves a perfect rocky impression. I have other rocks, but none as good as this. It has some flat areas and a few sharp edges so it gives a lot of variation. Different types of rock can make different textures. Sandstone tends to be too crumbly and gritty to work well.
There are other ways of texturing foam. Using a rolled-up ball of aluminum foil (tin foil) on foam will add random indentations to mimic stone and concrete.
CLAY SCULPTING TOOL
This is a cheap plastic tool from a Fimo sculpting set made by Staedtler. I use this all the time for shaping brick and stonework on XPS foam. It makes soft indentations and doesn’t drag or damage the foam. It’s good for opening up cracks and splits when doing flagstones or a damaged plaster texture on foam.
GLUES
There are a lot of glues that can be used with foam and the other sheet materials mentioned in this guide. Some are better than others for a particular purpose and each one has its own advantages and disadvantages. I’ll summarize the ones I’ve used here.

PVA
PVA glue is a widely available water-based craft glue, also used in the construction industry for sealing plaster. It’s available in different consistencies, usually dries clear, and can be used to seal foam. The parts being glued will usually need support while the glue dries. Pins or rubber bands can be used for this.
It’s not suitable for gluing large areas of foam as it will be unable to dry fully where the air can’t reach it. Mod Podge is a mix of PVA glue and acrylic varnish and acts as an all-in-one, glue, sealer, and protective coat.
WOOD GLUE
Wood glue can be used to stick EPS and XPS foam together and is very similar in its usage to PVA. The parts being glued need support while the glue dries, which can take a long time. Wood glue is much stronger and harder than PVA as it contains a type of resin (aliphatic).
NO NAILS
Usually sold in tubes that require a sealant gun but can be found in smaller, squeezable tubes. Generally acrylic and safe to use on foam but some brands, particularly for the construction industry, have solvents in them and should be avoided as they may damage the foam. If it says on the packaging that tools can be cleaned with soapy water it’s safe to use on foam.
It’s a thick white paste that doesn’t dry clear. Foam parts can be glued together without requiring support. It has gap-filling properties and can be thinned down with water. It’s useful for attaching resin, metal, and MDF parts to foam.
I use it by squeezing some out onto a palette (or piece of cardboard) and applying it with a small spatula to the foam. Any that squeezes out of the join I brush smooth with a damp brush. You can thin it with water and add paint to color it.
UHU POR
This is a variety of UHU glue that is specifically for use with foam. It’s a contact adhesive so you coat both parts and allow them to dry. The easiest way to coat both parts is to put the glue on one part, bring the two parts together then quickly separate them. This should leave a thin, matching coat of glue on both parts. Leave them a few minutes to dry and when you bring them together again they’ll stick instantly with a strong bond. It can be ‘stringy’ but sticks things very quickly.
HOT GLUE
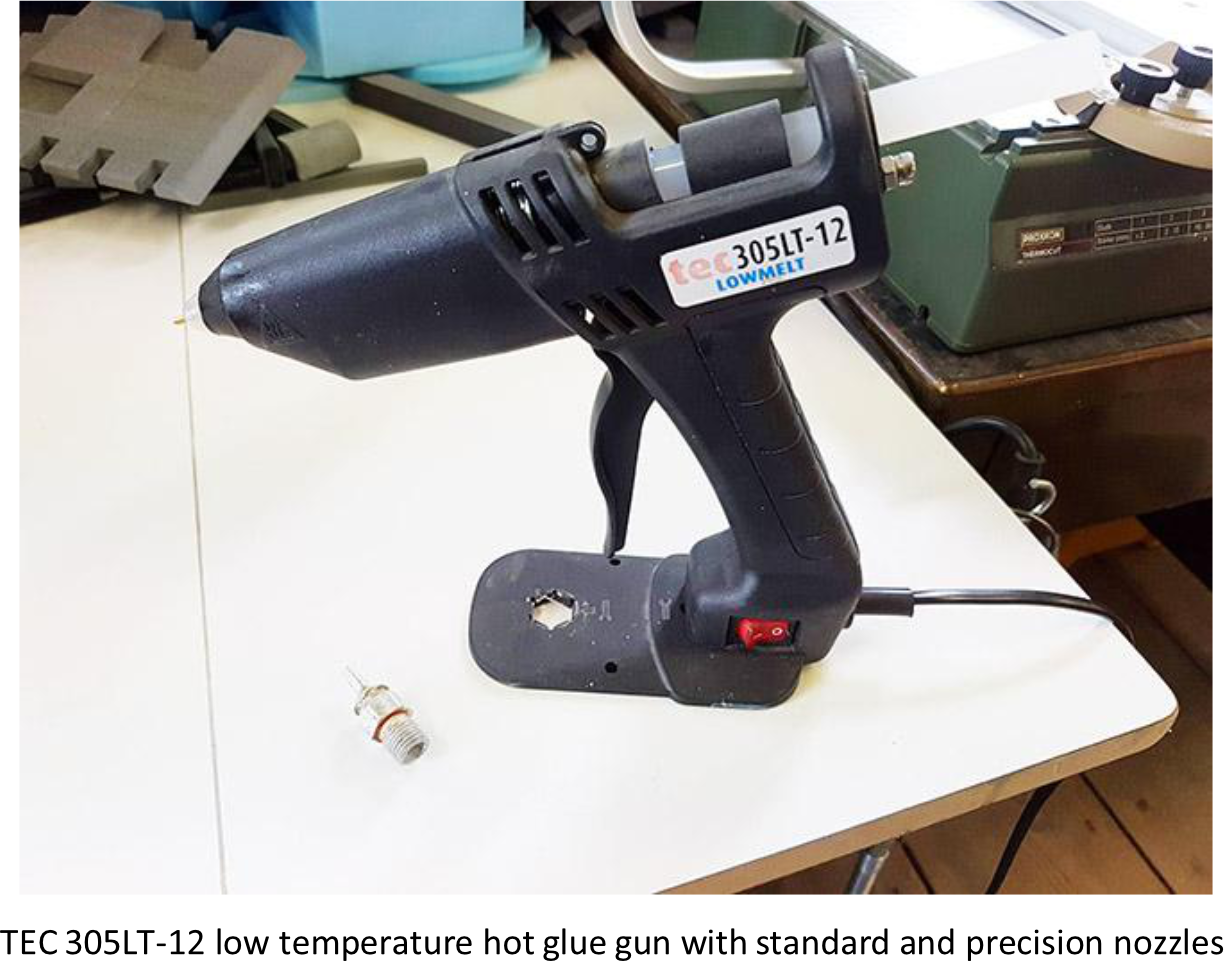
Using a hot glue gun is the quickest way to stick the foam together. If you use standard hot glue you have to be very careful as both the glue and the gun tip can easily melt the foam. I use a low-temperature hot glue gun. It operates at 130°C instead of the standard 190°C. It sticks things together almost instantly and very strongly. The downsides are that it can be messy, creating hair-like strings on your work and excess glue is harder to remove. The glue gun I use is a TEC 305 (low temp version). I’ve used a few glue guns over the years but none compare to this. It’s an absolute workhorse and a joy to use. I’ve got an interchangeable precision nozzle for it that’s good for detailed work and it makes less mess.
CA (SUPERGLUE)
CA (cyanoacrylate) glue, also called Superglue, is used for gluing foamed PVC. It’s generally not used on foam as it will easily melt it. I do use it for attaching small resin and metal parts to foam quickly. To do this you need to use a gel-type CA glue, sparingly, on the part to be attached and use an activator/kicker. Bicarbonate of soda (baking soda) can be used as an activator by dusting it on the foam.
POLYURETHANE (PU)
Polyurethane glue, such as the original ‘Gorilla Glue’ can be used for sticking together large sheets of XPS and EPS when making landscaped boards. It is activated by moisture so ensure one side of the material to be stuck together is damp. The glue expands as it cures so the parts have to be firmly held together. This is why it’s not suitable for gluing buildings together or other detailed modeling.
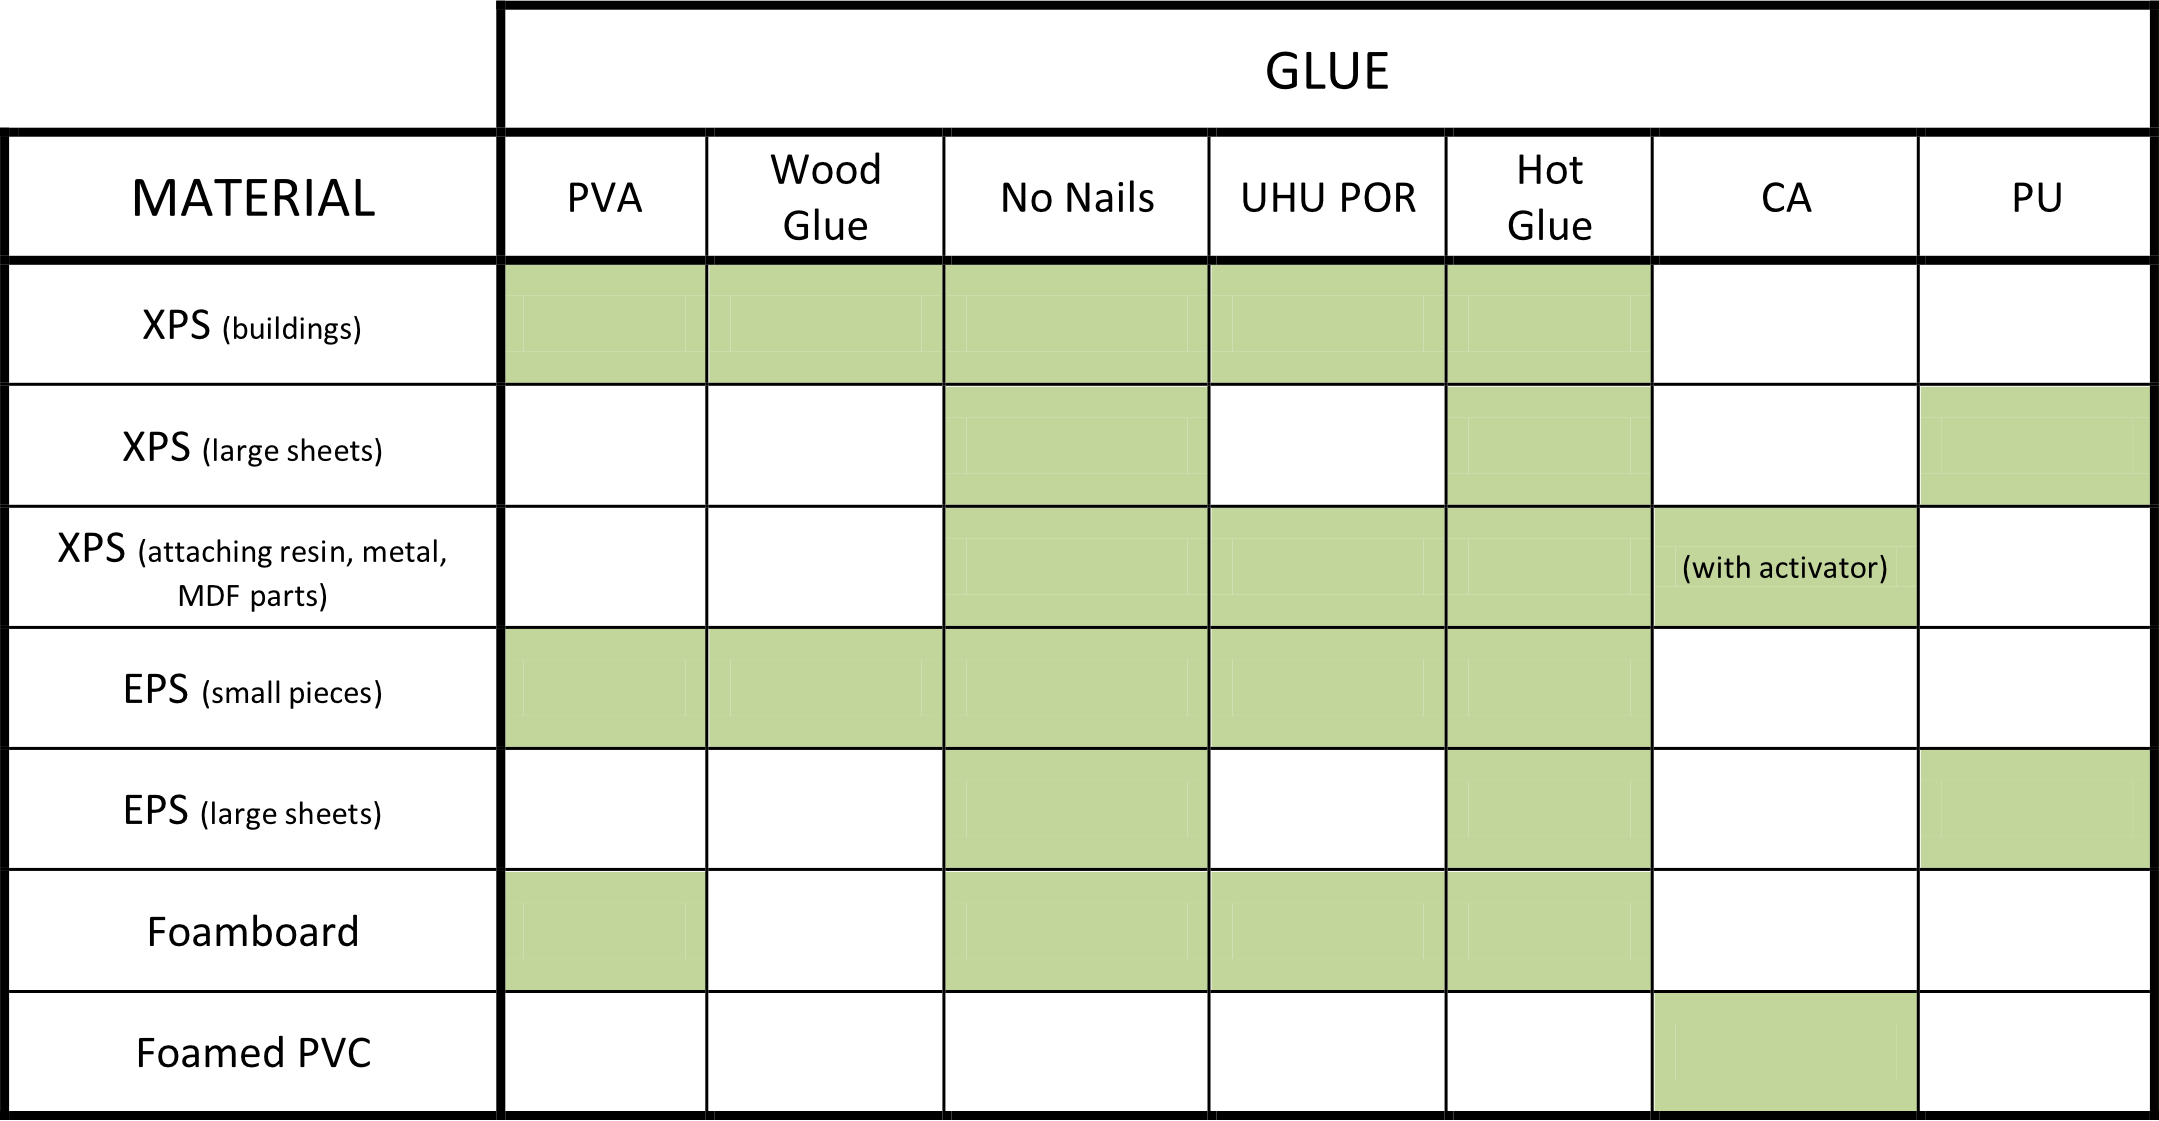
GLUE TYPE SUMMARY
Here is a table to check the suitability of glues with different materials. If it’s green it’s suitable. As you can see there is often more than one type of glue suitable for the material. What you use will depend on your own preferences and the specifics of the job you are using it for.
PAINTS AND VARNISH
Once you’ve made your model you’ll probably want to paint it to bring it to life. The main thing to remember is that some paints and varnishes contain solvents. Most solvents will dissolve foam. Make sure the paint you are using does not contain solvent. The easiest way to do this is to use acrylic paint, which is usually water-based. If it can be thinned with water and brushes cleaned with soapy water it will be safe to use on foam.
** Using aerosol spray paints: most spray can paints contain solvent or a propellant that will melt XPS and EPS foam, so even if the can says it is acrylic it is usually not safe to use on foam. How much the spray paint will react with the foam is dependent on the paint itself, how you use the spray and the type of foam you are using it on, so as a general rule they are best avoided. Spray paints and varnishes can be used once the foam is sealed (protected) by a layer of acrylic varnish, PVA (or Mod Podge), or heavy paint coat. **
If you are ever unsure as to whether the paint is safe to use on foam just test it first on a piece of scrap foam or on a part of the model that won’t be seen.
PAINTS
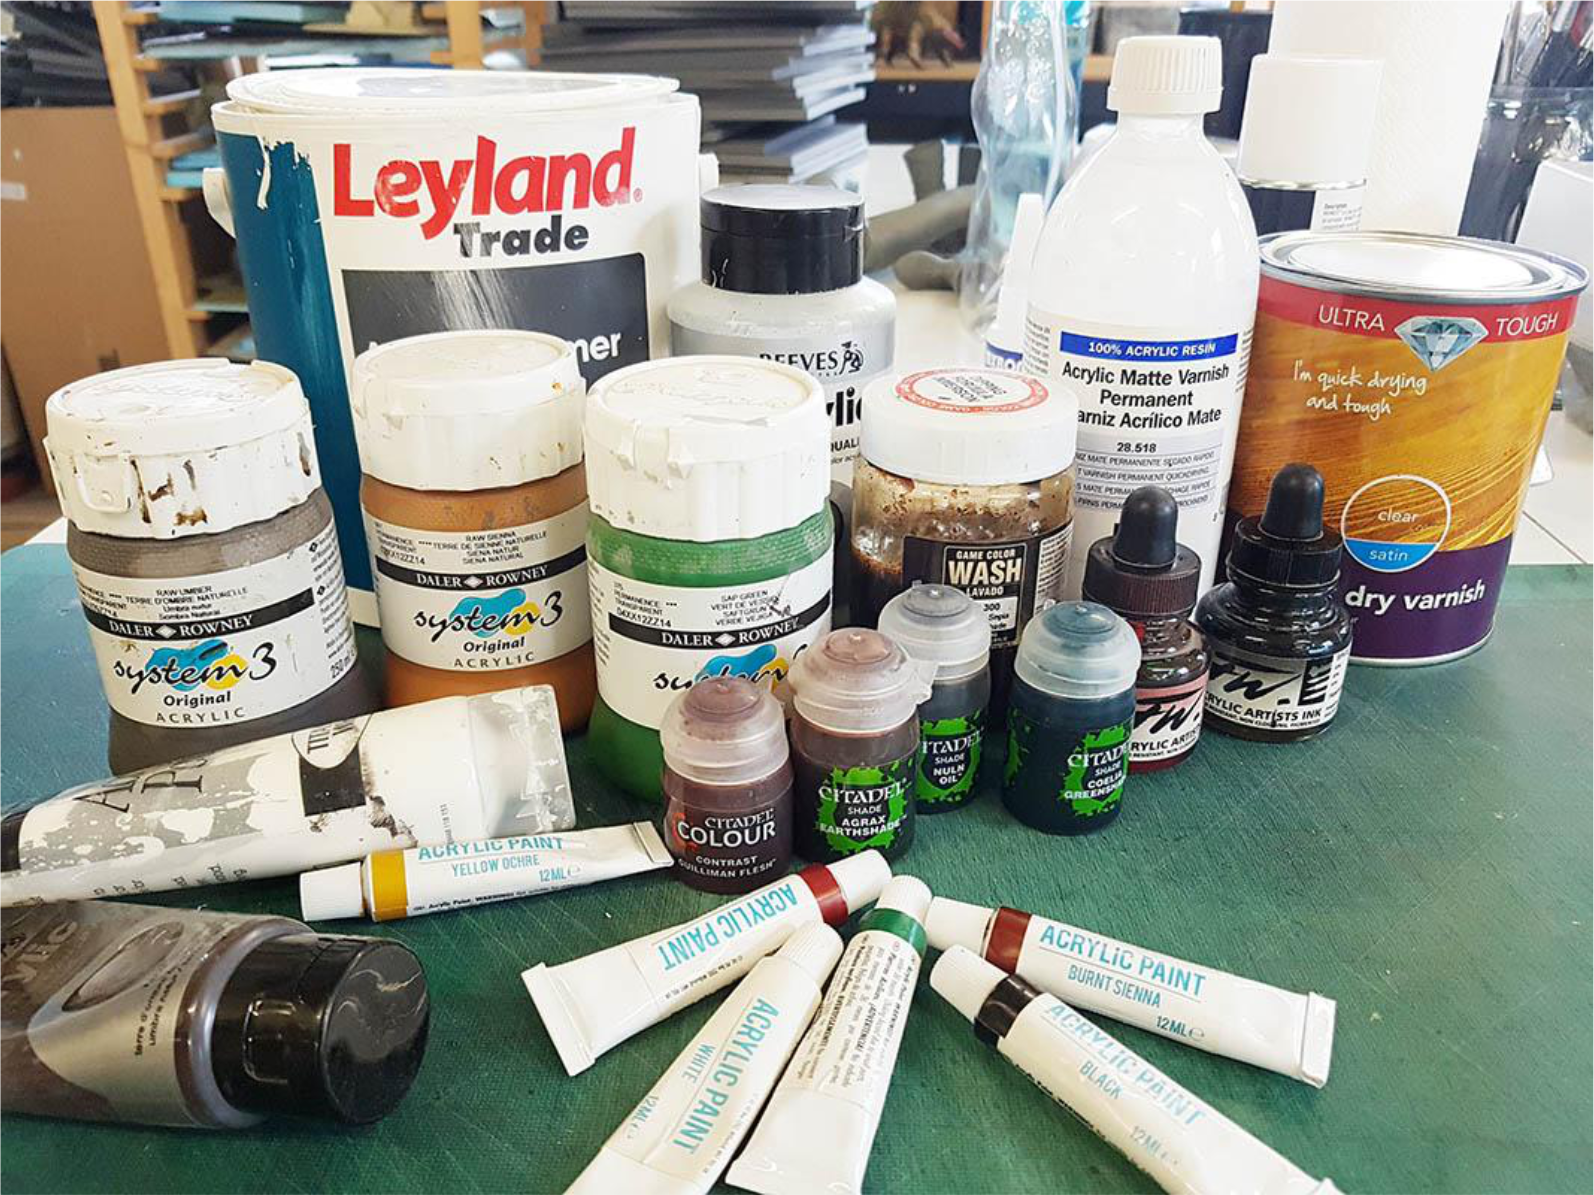
The best paints to use for your foam model are acrylic craft and artists’ paints. They come in a range of colors, sizes and prices. The more expensive artists’ paints tend to have denser, higher-quality pigments compared to cheaper craft paints. Household emulsion (latex) paint can also be used although it has longer drying times.
I use a range of paint brands gathered over the years including Winsor and Newton inks, Citadel paints and washes, Vallejo paints and washes including Vallejo Sepia Dipping Wash, which I use a lot and is great for shading. Also some ‘pound store’ tubes of acrylic and my main ‘go to’ paint Daler Rowney System 3 acrylics. I also have a large can of Leyland Trade (household emulsion), white primer/undercoat, which I mix with other colors to use on large, landscape models and game boards.
SEALING FOAM
You can usually paint straight onto XPS and EPS foam. Your first layer of paint may be partially absorbed by the foam depending on the density of the foam and how thin (watery) your paint is. Sealing the foam will make painting easier and can also add an extra layer of protection. You can seal the foam using acrylic varnish, PVA or Mod Podge. You can add acrylic paint to the PVA or varnish so that you get a base coat at the same time as sealing it.
VARNISH
Once you’ve painted the model you will want to varnish it to protect the paint. This will also add another layer of protection to the foam to save it from minor knocks.
Acrylic and polyurethane varnishes are usually safe to use on foam. The easiest way to check is the same rule used for paint. If it says on the tin that brushes can be cleaned with soapy water it will be safe to use on foam. Gloss and satin varnishes tend to protect a bit better than matte varnish. I use a quick-drying polyurethane satin varnish as a protective top coat, then a coat of matte varnish to reduce the shine.
USEFUL LINKS
Here are some links to sources for materials and tools to help you with your foam modelling hobby.
Firedragon Games
(pre-textured XPS foam sheets and resin accessories, UK)
https://www.firedragongames.co.uk/materials
Shifting Lands
(foam modelling tools, especially for Proxxon hotwire cutter, EU).
https://www.shiftinglands.com/
Living Heat
(grey XPS foam sheets, UK)
https://www.livingheat.co.uk/product/xps-underfloor-heating-insulation/
bluefoam.co.uk
(XPS blocks and sheets, UK).
http://bluefoam.co.uk/
4D Modelshop
(foam and other architectural modelling supplies, modelmaking guides, UK)
https://modelshop.co.uk/
David Neat
(architectural modelmaking with lots of useful foam-related guides)
https://davidneat.wordpress.com/
All content copyright Firedragon Games LLP 2020.
This document can be reproduced and distributed for non-commercial purposes only.